
I was sent an email a few weeks ago asking if I would take part in a Creative Artist challenge using Art Resin. It is the one and only resin I have used for the last few years…..
When I started my creative journey with Acrylic pour and resin I sampled different ones until I found this one…. I love it!! So when Rebecca from Art Resin emailed me to say would I be interested in taking part in an artist challenge using their resin and make something with it...... well of course it was a resounding Yes!!!
When the Art Resin arrived I was super excited to get started and a little nervous, what will I create…… and so the ideas started to flow, I wanted to be playful with this piece mix my animal spirit art with my acrylic pour technique….. and so the journey began....


When I work with acrylics I often like to work on a few art pieces at a time, as I did when I was creating this piece…. as I love to paint intuitively.... I find having a few on the go encourages my creative flow and play….. as one canvas or wooden panel is drying I can start on the next and so on….. and thankfully the weather here was lovely and sunny when I started this piece so I painted in the garden..... for me there is something that really helps to free my creativity when I am out in nature.....
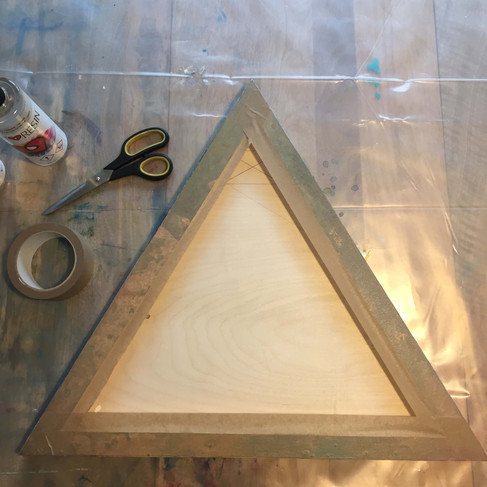
Firstly I covered the table surface with a reusable plastic cover...... I am a very playful messy painter so having a cover down helps protect the table top, and I always use one when I am finishing an art piece off in resin.
For this art piece I worked on a custom made wooden triangle… I often work on wood when I am working with resin as it's a great surface to work on……I sanded the surface and sides first ready for priming.... I then painted 3 coats of a gesso primer white.....
Once the primer was dry next came the colours.... I love to feel which colours I am drawn to in the moment, feeling their healing qualities..... and for this piece I used 'Golden' fluid acrylics and high flow acrylics and a water spray bottle to help the colours drip and mix together on the panel... and create their magic.....


Intuitively I could see a stag was emerging to the right side of the painting and so I started to paint the details of the Stag.... and then a golden eagle in flight...... and two dolphins swimming in the ocean..... I could feel the elements coming through this piece, Earth, Air, Fire and Water....


For the sides of the painting I wanted them to feel like a continuation of the front to finish it off.... so I painted the sides white first and then the colours of the painting....
Now I'm ready to resin.... Below I have listed a step by step guide on how I resined this art piece....I hope you find it helpful....


1. Before I resin I always make sure I cover the table surface with a reusable plastic cover.... this helps to protect the surface of the table
2. I taped along the edges of the back of the painting using artist tape.... ensuring there were no bubbles along the edge.... this is to help give a dripless and clean finish at the end


2. I then got together my equipment for the resin process:
Art Resin and Hardener
Reusable plastic table cover
3 Reusable plastic containers to balance the painting on
3 Reusable plastic cups to mix the Art Resin and hardener in
Spirit level (to ensure the surface is level)
Rubber gloves
Face mask
Kitchen roll
Blow torch
Tooth picks (to help pop any bubbles in the resin)
Ice lolly sticks or mixing the resin
3. Making sure my table surface is level with a spirit level, I place the art piece on top of the 3 plastic containers
4. I put my gloves and mask on to start measuring out the resin.... I am using the brand Art Resin and hardener it is a 1 to 1 ratio..... so I measure this out in equal quantities in reusable plastic cups and then mix them together for at least 3 minutes scraping the sides and the bottom of the cups to ensure it is fully mixed together (Art Resin have a resin coverage calculator on their website Artresin.com/calculator which is really helpful to know how much you may need)
5. I pour and spread the resin over the full surface of my art piece and I like to resin the sides too, so I go along the sides with the lolly stick and make sure these are covered in resin too. Even though I have taped along the bottom edge with artist tape to prevent the drips sticking to the bottom I still remove drips along the bottom as I am going along
6. To finish I pop any bubbles that are on the surface with a blow torch making sure to be careful and not get to close to the resin. And then with a tooth pick I remove any dust particles or remaining bubbles.
7. This is my favourite resin to work with as it gives about 45mins of working time before it starts to get tacky. And the quality when dry is amazing and super shiny. The Art Resin takes 24 hours to dry to the touch and this is a great time to remove the artist tape from the bottom edge, as if left till the resin is fully cured at 72 hours its harder to take off.
Here is the finished piece looking super shiny!!

And here is a video of me working with the Art Resin ....
I hope you find this blog helpful!!
Best wishes
Danielle xox
Commenti